THIS WAS ALL JUST A BIG SHOW.
AN ACT.
ALPHYS HAS BEEN PLAYING YOU FOR A FOOL THE WHOLE TIME.
AS SHE WATCHED YOU ON THE SCREEN, SHE GREW ATTACHED TO YOUR ADVENTURE.
SHE DESPERATELY WANTED TO BE A PART OF IT.
SO SHE DECIDED TO INSERT HERSELF INTO YOUR STORY.
SHE REACTIVATED PUZZLES. SHE DISABLED ELEVATORS. SHE ENLISTED ME TO TORMENT YOU.
ALL SO SHE COULD SAVE YOU FROM DANGERS THAT DIDN'T EXIST.
ALL SO YOU WOULD THINK SHE'S THE GREAT PERSON...
THAT SHE'S NOT.Mettaton, at the end of the CORE on the Neutral Route
The puzzles and shows performed by Mettaton that the protagonist encounters throughout Hotland and the CORE are later revealed to be puzzles that were reactivated by Alphys.
On the Genocide Route, Mettaton simply tells the protagonist that Alphys had left and announced his leave. All of the puzzle mechanics have been left disabled, and the elevators are fully operational with force fields preventing the protagonist to walk across the second floor of Hotland. Mettaton can then be found waiting at the end of the CORE since he changed his mind and decided that he wants to protect people (more specifically, his audience) so he transforms into Mettaton NEO.
First Floor[]
"Quiz Show"[]
Immediately after meeting Alphys in the Lab, Mettaton bursts through the wall and begins a Quiz Show with the protagonist as the contestant. The conditions proposed for the quiz show are to answer the questions correctly, or else the protagonist dies.
Answering the questions wrong causes Mettaton to electrocute the protagonist's SOUL and cut their HP in half for every wrong answer, rounding down. This therefore does not reduce HP to 0, if at 1. Throughout the show, Alphys signals the answers to the questions with her hands– repeatedly answering wrong causes Mettaton to allude to this.[1] If the protagonist's HP is at its lowest, Mettaton immediately skips to the last few questions.[1]
- For Questions and answers to the Quiz Show, see Mettaton/In Battle.
After all of the questions have been answered, or the protagonist has failed enough questions, Mettaton then asks "In the dating simulation video game "Mew Mew Kissy Cutie" what is Mew Mew's favorite food?" Alphys blurts out an extensive answer to the question, which leads Mettaton scolding Alphys for giving the protagonist the answer to the question.
From there, Mettaton asks "Who does Dr. Alphys have a crush on?" with the choices being Undyne, Asgore, the human, and "don't know." There is no incorrect answer to this question and the timer notably remains at 30.
After this question, Mettaton ends the quiz show since there is "no dramatic tension" since Alphys was helping the protagonist, but Mettaton mentions that the show was only the "pilot episode" and says his farewell to the audience.
Reactivated Door Puzzle[]
After the protagonist encounters conveyor belts, steam vents, and lasers, they come across an intersection. Alphys then calls the protagonist to say that the northern door will stay locked until the puzzles on the left and right are solved, and suggests heading to the puzzle on the right first.
The shooting puzzle on the right.
The shooting puzzle on the right can be solved by pressing either up or down, then pressing either left or right. From there, the protagonist can shoot twice to hit the opposing ship.
The shooting puzzle on the left.
Upon heading for the shooting puzzle on the left, an "impassable" blue laser blocks the protagonist's path. Alphys then calls the protagonist and deactivates it in front of them. From there, the shooting puzzle on the left can be solved by entering up, left, down, left and then shooting twice.
Once both puzzles are complete, the northern door opens up accordingly.
"Cooking with a Killer Robot"[]
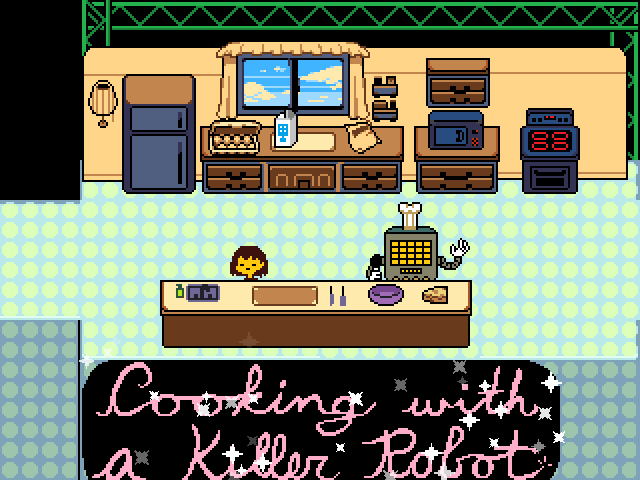
Mettaton announcing "Cooking with a Killer Robot."
Shortly after the last puzzle, the protagonist enters a dark room. Alphys then hacks into the light system to turn the lights on. This puts the protagonist in the middle of the underground's cooking show, "Cooking with a Killer Robot."
Mettaton announces that a cake would be made and tells the protagonist to gather the sugar, milk, and eggs on the back counter. A "death forcefield" appears if the protagonist attempts to exit the room from here.
After bringing the ingredients to the front counter, Mettaton attempts to attack the protagonist since the recipe calls for a human SOUL. Alphys interrupts with a phone call and suggest a vegan alternative for the recipe. Mettaton then tells the protagonist to fetch the substitute ingredient on the right.
Attempting to open the fridge causes Alphys to call the protagonist about how it is not an appropriate time to get a snack, and mentions how she is eating potato chips in her pajamas. She tells the protagonist to head over to the right.
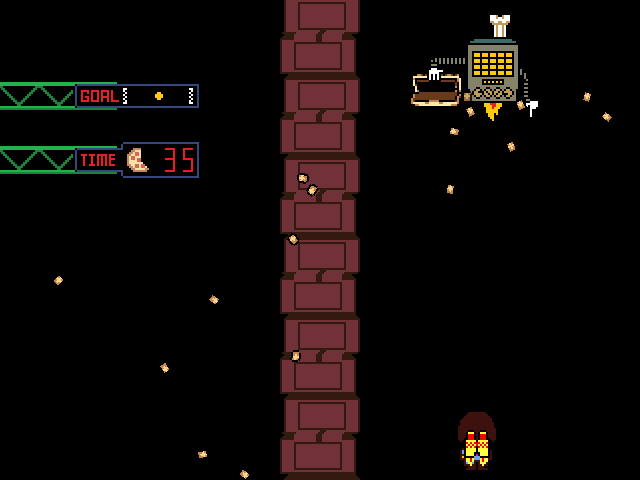

Mettaton attempting to prevent the protagonist from reaching the substitute in time.
Upon approaching the substitute ingredient, the counter the substitute ingredient is on begins getting taller, and Mettaton announces that the protagonist needs to get the substitute in under a minute. Alphys then notifies the protagonist that their cell phone has a "JETPACK" button, and they activate it.
If the protagonist reaches the ingredient in time, Mettaton tells the protagonist that he has already baked the cake ahead of time and exits. If the protagonist fails, Alphys calls, asking why the protagonist is not moving; Mettaton interrupts and mentions that the show is on a commercial break, refusing to kill the protagonist without a live audience watching. Regardless of the outcome, Alphys tells the protagonist to keep moving forward.
Second Floor[]
The Conveyor Belt Puzzle[]
The protagonist attempting the conveyor belt puzzle.
The Conveyor Belt Puzzle contains two conveyor belts moving in opposite directions and three switches lined up with the top conveyor. Alphys calls beforehand to explain the solution, which is to ride the top conveyor and hit all three switches in succession, and she promises to try to help the protagonist with the rhythm.
After hitting the first two switches and approaching the last, Alphys calls to tell the protagonist to hit the third switch, but only ends up interrupting them in doing so. Embarrassed, she shuts off the force field anyways, assuring the protagonist that only the first two buttons needed to be pressed. Notably, pressing the first two buttons and then stalling on the conveyor belt by walking right does not disable the force field, foreshadowing Alphys's whole act.
It is possible to hit all three switches at once with the Punch Card Exploit, but this may result in a "Fatal Error" or the Cell Phone ringing indefinitely until the protagonist leaves.
The Vent Puzzle[]

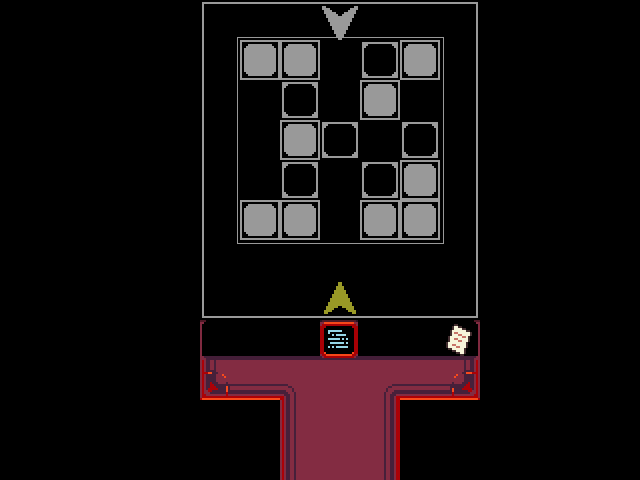
The protagonist solving the vent puzzle.
The Vent Puzzle contains seven pillars of steam vents with five floor panels on four of the pillars and the starting position. Alphys is absent for the whole puzzle (although this does not make much of a difference), leaving the protagonist to solve the puzzle themself.
The solution to the vent puzzle is to proceed from right to left in a U-shaped form of movement, but moving back to a previous panel and continuing once during the sequence. If they cannot perform the first movement downwards, they need to move to the pillar at the top of the puzzle to switch the vents back to normal.
"MTT NEWS"[]

Mettaton reacting to the protagonist choosing the Annoying Dog.
After listening to Alphys complain about "Mew Mew Kissy Cutie 2" and dealing with the Royal Guards, the protagonist enters another dark room.
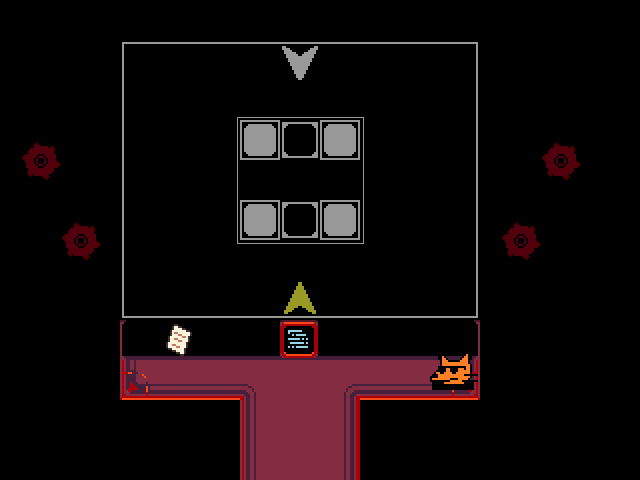
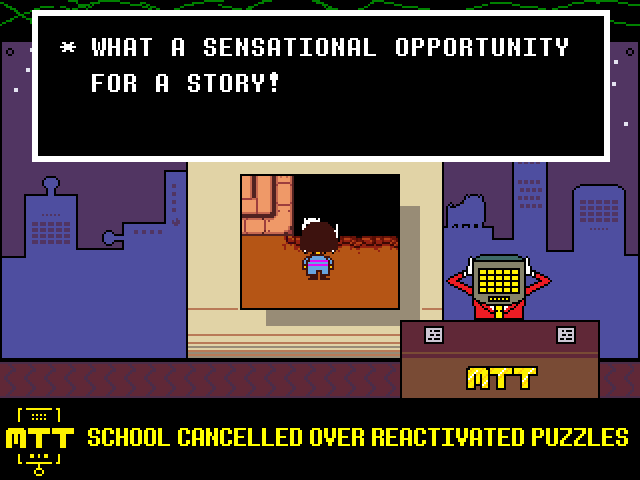
Alphys calls the protagonist to turn on the light and reveal Mettaton's next show, "MTT NEWS." Mettaton then asks their "brave correspondent," the protagonist, to find something newsworthy to report. Attempting to exit the designated area of intrigue causes the "death forcefield" to appear again.

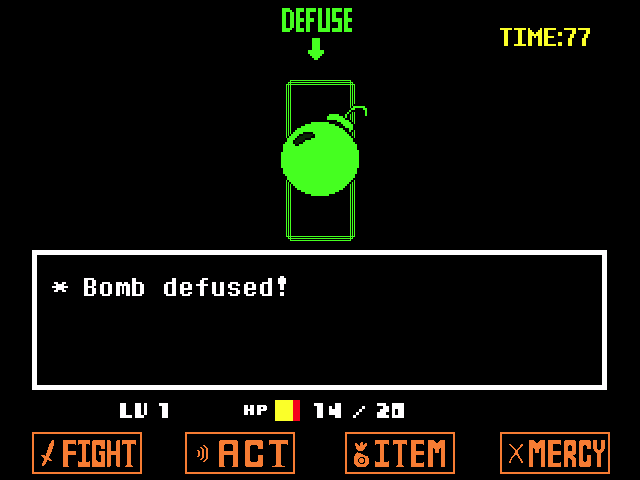
The protagonist successfully defusing one of the bombs.
Once an item to report on has been chosen, Mettaton reveals that the item is actually a bomb, and then reveals that everything else in the room is a bomb. The protagonist then has two minutes to defuse all six bombs in the room, being told a larger bomb will explode otherwise. To deactivate the bombs, the protagonist can either select "ACT" and then "Defuse" when the bomb moves into the green defuse box, or simply "FIGHT" and attack the bomb. The protagonist is actually given two minutes and an additional twenty seconds (by means of the timer slowing during the last minute), presumably given as an extension by Alphys.
If the protagonist defuses all of the bombs in time, Mettaton announces that the bomb will now instead explode in two seconds. Alphys then calls, and Mettaton mentions that she deactivated the bomb with her hacking skills.
If the protagonist fails to deactivate all bombs in time, Mettaton notes that the bomb is not going off and mentions that Alphys deactivated the bigger bomb with her hacking skills. If the protagonist failed to defuse a single bomb, while encountering a bomb, Alphys initiates the dialogue by calling to say "You couldn't even get one bomb...!?"
Third Floor[]
Reactivated Door Puzzle[]

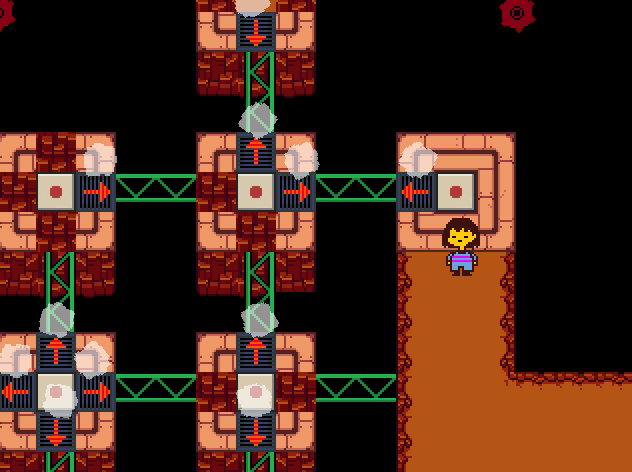
The shooting puzzle to the north.
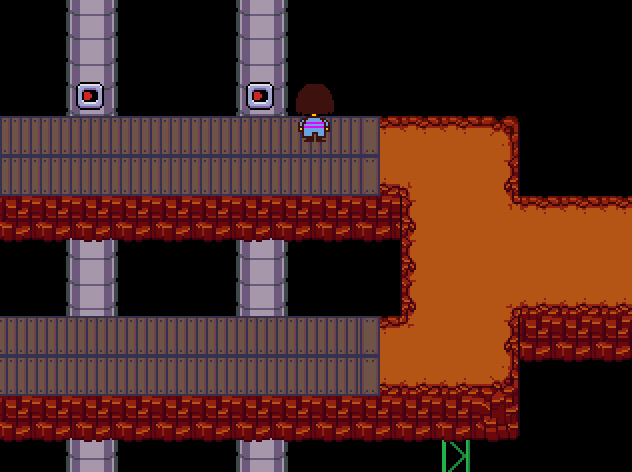
The protagonist encounters a room with steam vents, and Alphys informs them that the door to the very right is opened if the North and South puzzles are solved.
The quickest route to the Northern Puzzle is: Right, Up, Right, Down x2, Right, Right/Up, Up/Right, Up x2, Right and Up.
The protagonist travels through an empty cross-shaped room to the puzzle, which is another shooting puzzle. The quickest solution to this puzzle is inputting the directions "Left, then Right." Once the protagonist completes the puzzle and exits that room, they see the Diamond Boys, who talk about their favorite Mettaton moments, which serve as benefits in his battle as EX.
The quickest route to the Southern Puzzle from the very left of the room is: Right, Up, Right, Down x2, Right x2, Down, Left, and Down.
The protagonist encounters multiple conveyor belts, one of which has three blue laser drones the protagonist must avoid. The solution to the puzzle is the directional inputs "Left x3, Up, Left x2, then Right."

The shooting puzzle to the south.
Once both puzzles are complete, the protagonist can continue to the right side of the room and open the door. Passing the door, they enter a room with cobwebs in the background and a SAVE point residing within. The next room is filled with spider webs that have small spiders and Muffet residing within, and so, begins the mini-boss battle.
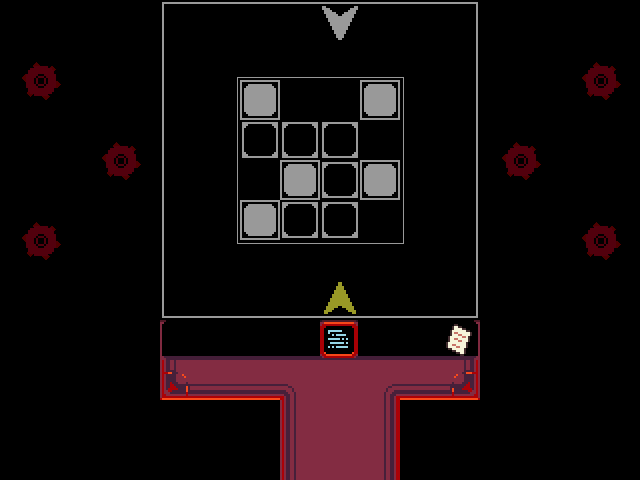
"Undertale the Musical" + Multicolor Tile Puzzle[]
- Main article: Multicolor Tile Puzzle
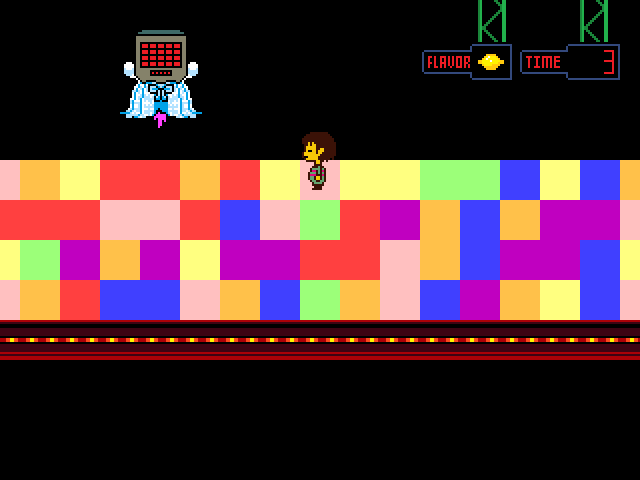

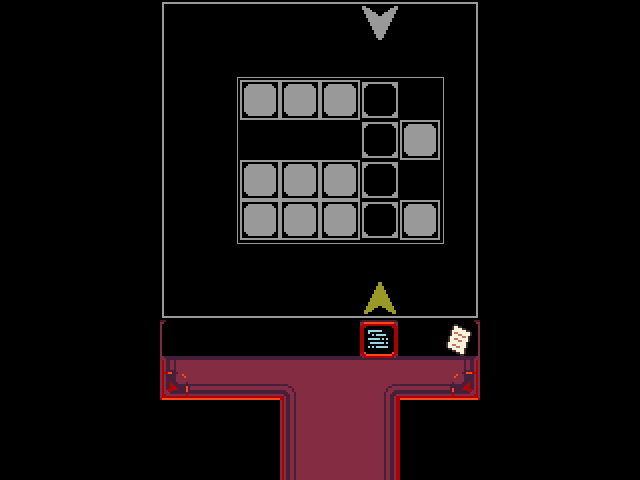
The protagonist attempting the Multicolor Tile Puzzle.


The solution to the Multi-Color Puzzle.
Upon entering the room, Mettaton calls down to the protagonist and begins the performance. The protagonist cannot affect anything during the whole sequence, nor can they leave the area since force fields block the exits.
After the performance, Mettaton activates a trap door which the protagonist falls into and greets them again, reusing the Multicolor Tile Puzzle from Snowdin. He begins to explain the rules but cuts himself off, saying that the protagonist has already heard the rules "ABOUT A HUNDRED ROOMS AGO." Pillars of flame then emerge from the sides of the room, which close in if the puzzle is not completed within 30 seconds. Mettaton then fights the protagonist, being the monster summoned by the green tiles.
If the protagonist refuses to touch the puzzle or decides to stay on the first tile of the puzzle, Mettaton notes that they did not step on a green tile, then attacks them anyways.
Humorously, the game window reads "Undertale: The Musical" for the entirety of this sequence.
CORE[]
The CORE, when the protagonist enters it, has been rearranged by Mettaton at the last moment and also contains enemies because of Mettaton.[2]
Before the protagonist enters, two shadowy figures enter the CORE entrance. Alphys is confused about why they are entering and tells the protagonist to enter the CORE anyway.
When the protagonist enters the CORE, Alphys instructs them to take the elevator to the top. However, the elevator is not working, which surprises Alphys. She then suggests taking the right path, which leads to a pit of fire which is not a location on Alphys's map. She then suggests taking the only path unchecked (left). The protagonist enters a room with a straight path forward and encounters Madjick along the way. After the fight, Alphys questions the abnormal number of monsters but rhetorically assures the protagonist it is not a problem.
The next room has an energy field that can only be disabled if the protagonist hits the switch next to it. However, hitting the switch sets the laser drones into motion in a certain order. Alphys says the following order: "Orange. Orange. Blue." and tells the protagonist to move until the third laser. This proves to be problematic since the order the lasers come in is opposite to those mentioned above. Alphys expresses concern after the event and apologizes, assures the protagonist everything is fine, and says progress should continue normally.
The protagonist then walks to a three-way intersection. Alphys first instructs the protagonist to head right. If the protagonist attempts to choose the right path, she then tries to instruct the protagonist to head up. The north path contains a battle with Knight Knight, so the correct path is going to the right.
The room after this contains a bridge with numerous lasers over it. Alphys tries to deactivate the lasers but they do not turn off, so she shuts off the power for the whole node. After walking over a third of the bridge, on a section of the bridge with blue lasers, the power for the lasers then turns back on. Alphys instructs the protagonist to move when she shuts off the power. If the protagonist gets hurt, Alphys calls them. After completing this section, the power turns back on, and the lasers remain off.
The final area of the CORE, where Alphys gives up on giving the protagonist directions, is a 3x3 maze. The northwest part of the maze contains a trash can with a Glamburger inside, and the northeast part of the maze contains 100G. The southwest part of the maze contains a conveyor belt with ice that evaporates to cool down the CORE. A monitor on the wall near the southernmost part of the maze talks about the "Warrior's Path" and the "Sage's Path":
- The "Warrior's Path" refers to the room that can be found in the northernmost part of the maze. This path requires the protagonist to fight three groups of enemies before flipping a switch. The battles are always "Whimsalot and Final Froggit" first, "Knight Knight and Madjick" second, and "Final Froggit, Astigmatism, and Whimsalot" last.
- The "Sage's Path" refers to the room found at the westernmost part of the maze. This path simply contains a complex shooting puzzle.
- There is a third option available. One must simply take the eastern route to the end. Reading the sign reveals "I cannot fight. I cannot think. But, with patience, I will make my way through." If the protagonist stays in the area long enough, the force field simply dissipates and allows them to move on through without going down either path.
While the protagonist can solve both, only one of these paths needs to be picked to disable the force field found at the easternmost part of the maze which prevents the protagonist from accessing the bridge to the end of the CORE.
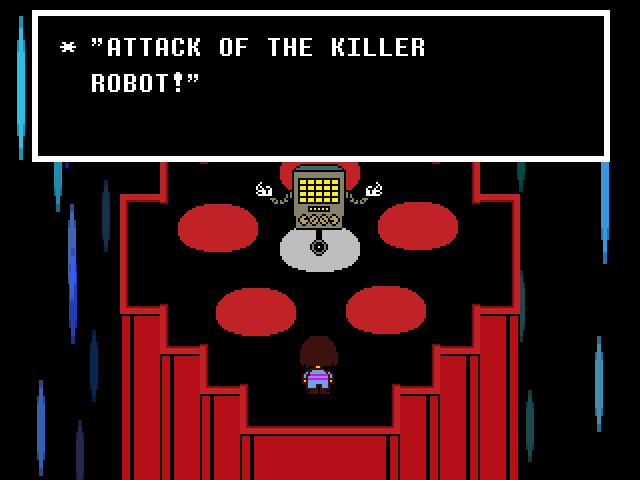
"Attack of the Killer Robot"[]

At the end of the CORE is Mettaton, who has chosen to divert from Alphys's plan to insert herself into the protagonist's story and make herself seem like a good person. Mettaton then closes the door, preventing Alphys from heroically saving the protagonist from him, and then announces "Attack of the Killer Robot." He is then fought.
True Lab[]
- Main article: True Lab
The only key the protagonist can obtain at first is the red key. They must go to the left of the power room, turn on all three sinks, and battle the Memoryheads. Then they must insert the red key into the slot to open up the door on the right, gaining access to the rest of the True Lab.
The yellow key can be obtained right after entering the bedroom, by inspecting the rightmost bed with its sheet pulled up, in the center row. The yellow key's respective slot is in the room with the VHS tapes and TV, next to the DT Extraction Machine room.
The green key is located in a room down the hallway leading to the DT Extraction Machine, where a strange, eerie Amalgamate is seen located in a bathtub on the opposite side of the room. The protagonist's movements slow drastically upon approaching the bathtub, and the Amalgamate's movements speed up as they get closer, until the protagonist reaches the bathtub to find nothing but the green key. Its slot is found at the end of the refrigerator room (which can be reached even before the fans have been activated).
The room possessing the blue key is initially blocked by Lemon Bread, disguised as a SAVE Point near the DT Extraction Machine, who must be fought to progress. Even then, the room is shrouded in mist, and the event dropping the blue key does not activate. Before the blue key can be dropped, the protagonist must first turn on the air circulation in the fan room, where they must fight Endogeny.
The refrigerator room can finally be traversed easily after the mist is blown away. The protagonist must check the last fridge at the end of the hallway and walk away, after which the battle with Snowdrake's Mother commences. Upon defeat, the blue key is dropped. Its slot is found on the far side of the Golden Flower corridor, where Reaper Bird at the end must be fought to reach the room.
Once all four keys have been inserted into their respective slot, the elevator door is activated. The elevator itself is not activated, and the protagonist has to go to the left and activate the power of the elevator, before being ambushed by the amalgamates, who are stopped by Alphys's timely intervention.
Trivia[]
- When Mettaton shows the larger bomb, he says if they fail to defuse the six bombs, the bomb will detonate in two minutes. However, upon closer inspection, the timer on it shows five minutes.
- The video game featured in MTT News shows a striking similarity to Undertale.
- Upon failing the Reactivated Door Puzzle, there is a 1/100 chance that the text "RESTART..." will change to "RESTAURANT...".[3]
- The protagonist can remain on the ground before the conveyor belt leading to the Multicolor Tile Puzzle. If they move down as far as they can go, when the timer hits 0, the dialogue box appears at the top of the screen. Mettaton can then appear layered in front of the box while behind the dialogue text.[4]
References[]
- ↑ 1.0 1.1 "Losing" Mettaton's Quiz Show - YouTube
- ↑ YES, I WAS THE ONE THAT RE-ARRANGED THE CORE!
I WAS THE ONE THAT HIRED EVERYONE TO KILL YOU! - Mettaton - ↑ failing the undertale block shooting puzzles normally produces the message "restart...". however, there's also a rare 1/100 chance that it'll say "restaurant..." instead. some true replay value right there. easter egg originally discovered by @BenjaminUrquhrt - @Maximus123458 on Twitter, December 05, 2020.
- ↑ A Mettaton Visual Glitch - YouTube